U nas zapłacisz kartą
Mincer Mikrodermabrazja - Nowoczesna Metoda Odmładzania Skóry w Salonie Hebe
Best hebes to grow
Browse our pick of the best hebes to grow:
Hebe 'Celebration'
A half-hardy hebe, Hebe 'Celebration' forms a tight mound of variegated foliage, from which clusters of purple-pink flowers appear in late spring.
Hebe 'Frozen Flame'
Hebe 'Frozen Flame' has greyish-green leaves with a white edge that turn a pinkish-purple in winter. In summer, blue flowers are borne in bright clusters.
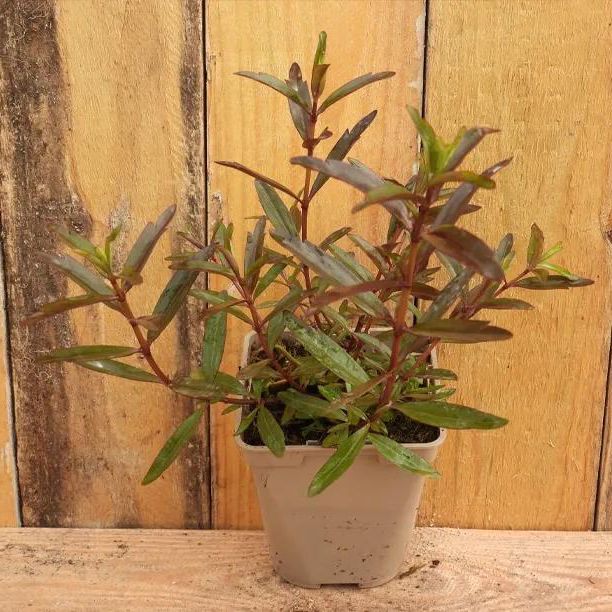
Hebe 'Green Globe'
Hebe 'Green Globe' is a compact shrub with a round habit and small, closely packed branches.
Jak probíhá první schůzka s lékařem?
Při první konzultaci vám odborník položí otázky týkající se vašeho zdraví a anamnézy, aby se ujistil, že zákrok nemá žádné kontraindikace. Dále budou položeny otázky o účincích, kterých chcete dosáhnout, a o tom, co se vám na vaší pleti nelíbí, aby bylo možné určit, která řešení budou pro vás nejlepší, ještě před vyšetřením vaší pokožky.
Odborník vám podrobně vysvětlí všechny důležité aspekty: co je to ošetření mikrodermabrazí, kolik sezení bude potřeba, jak pečovat o pokožku mezi jednotlivými sezeními, jaké účinky můžete očekávat a jak byste měli pečovat o svou pleť.
Pokud se rozhodnete podstoupit ošetření, lékař vám pravděpodobně naplánuje první sezení během několika příštích dnů.

How to grow hebes
All you need to know about growing bee-friendly hebes, in our detailed Grow Guide.
Hebes are popular evergreen shrubs, mostly native to New Zealand although some are indigenous to Australia and South America. They come in a variety of shapes and sizes, and are suitable for growing in a wide range of sites and planting schemes. Hebes are excellent in shrub borders, used as ground cover or low-growing hedging, and are relatively low-maintenance.
Hebes flower over a long period – all year round in mild regions – with flower colours including pink, blue and white. They can be an important late-year source of nectar and pollen for bumblebees. Leaf colour varies too, from dark green to pink and variegated. Less-hardy hebes can be grown in cool glasshouses or alpine houses.
Jak se provádí mikrodermabraze?
Nejprve je vaše pleť důkladně odlíčena, poté přichází na řadu mechanický peeling přístrojem s různými nástavci, a hned poté masáž obličeje, krku a dekoltu (podle toho, co zrovna podstupujete). Existuje několik různých způsobů, jak postup provést, na základě konkrétního použitého zařízení. Přístroj s diamantovým hrotem je navržen tak, aby jemně odlupoval odumřelé buňky v pokožce. Zároveň je okamžitě odsaje. Takové ošetření se nazývá diamantová dermabraze. Hloubku oděru může ovlivnit tlak vyvíjený na násadec a také doba zákroku. Tento typ mikrodermabrazního aplikátoru se obecně používá v citlivějších oblastech obličeje, například v blízkosti očí. Krystalická mikrodermabraze používá nástavec s krystaly, které se třou o vnější vrstvu pokožky a jemně ji mechanicky obrušují. Stejně jako nástavec s diamantovým hrotem jsou mrtvé kožní buňky ihned odsávány. Existují různé typy krystalů, které lze použít, zahrnují oxid hlinitý a hydrogenuhličitan sodný. Hydradermabraze je novější metoda a probíhá formou přístrojové vakuové abraze, tedy odstranění odumřelých kožních buněk a nečistot pomocí podtlaku. Celý proces stimuluje produkci kolagenu a maximalizuje průtok krve do pokožky. Při zákroku se přejíždí po obličeji speciálním nástavcem, který vždy mírně vsaje pokožku a s ní i nečistoty z jejího povrchu. Následně je aplikováno hydratační a ošetřující sérum.